The Novice’s Guide to Builder Gel Nails
Introduction to Builder Gel Nails
If you’re looking to enhance your nail game, builder gel nails might be the perfect choice. Unlike traditional nail polishes or gel polish, builder gel provides a thicker, more durable overlay that can add length and strength to your natural nails. How to do builder gel nails? It’s a favorite among those who seek a longer-lasting manicure with a professional finish.
Builder gel is a type of nail enhancement that comes in a gel-like substance. It requires curing under a UV or LED lamp to harden and set. This process creates a strong foundation that can protect your nails from breaks and chips. With builder gel, you have the flexibility to sculpt the nails into various shapes and lengths, making it ideal for anyone wanting to customize their look.
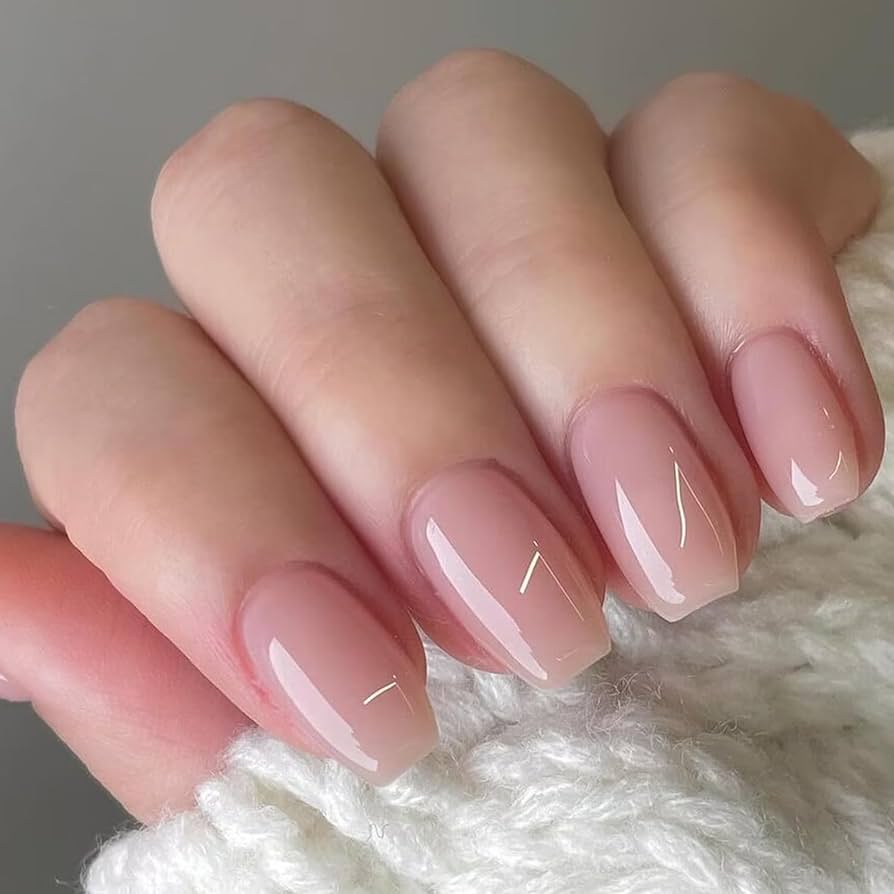
The beauty of builder gel nails lies in their versatility. Whether you’re aiming for a subtle, natural appearance or dramatic, bold nails, builder gel can deliver. It’s also a popular choice for those who want to grow out their natural nails, as it adds an extra layer of protection against daily wear and tear.
Now that you have a basic understanding of what builder gel nails are, let’s dive into what you’ll need to get started with “how to do builder gel nails” at home. In the next section, we’ll discuss the essential tools and materials required for a successful builder gel manicure.

Essential Tools and Materials
Before starting your journey with builder gel nails, you’ll need to gather the right tools and materials. Preparation is key, and having everything on hand will make the process smoother and more enjoyable. Here’s what you need to create your perfect builder gel manicure at home:
- Builder Gel: This is the main product you will use. It comes in a pot or bottle.
- UV or LED Lamp: To cure the builder gel, you need a lamp. LED lamps cure faster.
- Nail File: You’ll shape your nails with a good quality nail file before applying gel.
- Buffing Block: This tool helps create a rough surface for the gel to adhere to.
- Primer: A nail primer improves adhesion, reducing the risk of lifting.
- Base Coat: It protects your natural nails and provides a foundation for the gel.
- Top Coat: To give your nails a shiny finish and extra protection, use a top coat.
- Nail Cleanser: Clean your nails with a cleanser to remove oils and debris.
- Lint-Free Wipes: These are useful for cleaning nails and wiping off tacky layers.
- Cuticle Pusher: Gently push back your cuticles for a neat nail bed.
- Cuticle Oil: After completing your manicure, cuticle oil will keep your skin nourished.
Keep these tools within reach to ensure a smooth application process. Remember, using high-quality products and tools can make a significant difference in the longevity and appearance of your builder gel nails. Next, we’ll guide you through preparing your nails for the builder gel application, so you can achieve the best results possible.
Preparing Your Nails for Builder Gel Application
Proper preparation of your nails is crucial for a successful builder gel manicure. Here’s a step-by-step guide on how to prepare your nails before applying builder gel:
- Clean Your Nails: Start by using a nail cleanser and lint-free wipes to remove any oils or debris from your nails. This ensures a clean surface for better adhesion of the gel.
- Shape Your Nails: Use a nail file to shape your nails to your desired length and form. Whether you like them rounded, square, or stiletto is your choice.
- Buff Your Nails: Take a buffing block and gently buff the surface of each nail. This creates a rougher surface that helps the builder gel adhere better.
- Push Back Cuticles: Use a cuticle pusher to gently push back your cuticles. This step prevents the gel from lifting and ensures the gel sits neatly on your nails.
- Apply Primer: Once your nails are shaped and buffed, apply a thin layer of nail primer. The primer acts as an additional adhesive layer between your nail and the builder gel.
By following these simple steps, your nails will be ready for a smooth and durable builder gel application. Each step plays a crucial role in the longevity of your manicure, so don’t skip them!

Step-by-Step Application Process
After preparing your nails, you are ready to apply builder gel. Follow these steps closely for best results:
- Apply Base Coat: Start with a thin layer of base coat. Cure it under your LED or UV lamp as directed by the product.
- Builder Gel Application: Scoop a small amount of builder gel with a spatula or brush. Apply it in the middle of your nail. Spread it evenly towards the edges, avoiding cuticles. For added length, use nail forms.
- Cure the Builder Gel: Place your nails under the UV or LED lamp. Cure for the time specified by the builder gel’s instructions. Each layer needs curing before adding another.
- Additional Layers: If needed, apply additional layers of builder gel. Cure each layer fully to build strength and thickness.
- Shape and File: Once the gel is set, shape the nails with a file. Focus on the sides and tip to achieve your desired style.
- Buff the Surface: After shaping, buff the nails to smooth out any imperfections.
- Apply Top Coat: Apply a top coat for shine and protection. Cure the top coat under the lamp.
- Cleanse and Oil: Use a nail cleanser to remove any sticky residue. Finish by applying cuticle oil to nourish the skin around your nails.
Be patient and precise with each step to achieve a professional look. Ensure each layer is smooth and even before curing, as this defines the final appearance of your nails.
Tips for Sculpting the Perfect Gel Nail
Achieving the perfect sculpted gel nail requires attention to detail and careful technique. Here are some tips to help you sculpt the ideal builder gel nail:
- Correct Tool Selection: Use a specialized gel brush for precise application. A good brush aids in spreading the gel evenly.
- Gel Placement: Start by placing a bead of gel in the nail’s center. Gently guide it toward the edges, being careful not to touch the cuticles.
- Thickness Consistency: Maintain an even thickness across the nail. Thinner at the cuticle area, thicker in the middle, and tapering off at the edges gives a natural look.
- Avoid Air Bubbles: When applying builder gel, ensure no air gets trapped. Air bubbles can weaken your manicure.
- Use of Nail Forms: For extending the nails beyond their natural tip, consider using nail forms. They help shape the gel as it cures.
- Slow and Steady Application: Do not rush. Take your time to perfect the shape before curing under the lamp.
By following these tips while applying builder gel, you can sculpt beautiful, even, and durable gel nails.

Curing the Gel: Techniques and Best Practices
Curing your builder gel nails is a critical part of the process. Here’s how to do it right:
- Use the Right Lamp: Check if your builder gel requires a UV or LED lamp. Use the kind specified for optimal results.
- Proper Timing: Cure the gel according to the time given in the instructions. It’s usually between 30 seconds to 2 minutes.
- Even Curing: Place your hand flat under the lamp. Make sure each nail gets even exposure to the light.
- Layer by Layer: If adding multiple layers of gel, cure each one before the next. It prevents uncured gel from ruining your nails.
- Thumb Positioning: Your thumb lays on its side more naturally. Turn it inward so the whole nail cures evenly.
- Final Layer Truth: After applying the top coat, cure once more. It seals in the previous layers for lasting shine and protection.
- Cool Down: Let your nails cool for a bit after curing. It sets the polish and prevents smudges.
Follow these best practices to ensure your builder gel nails stay beautiful and durable. Remember that patience and careful attention will pay off in long-lasting manicure results.
Aftercare and Maintenance
Proper aftercare will maintain your builder gel nails’ beauty and durability. Follow these maintenance steps for best results:
- Hydrate Your Cuticles: Use cuticle oil twice a day to keep the skin around your nails moisturized.
- Wear Gloves: Protect your manicure when doing housework or gardening by wearing gloves.
- Avoid Harsh Chemicals: Limit your nails’ exposure to harsh chemicals. These can weaken the gel.
- File As Needed: If you notice any snags or rough edges, gently file them down. Avoid reducing thickness too much.
- Be Gentle: Don’t use your nails as tools. It can cause chips or lifting of the gel.
- Regular Touch-Ups: Return to your nail technician or do a home touch-up when your nails grow out. It maintains their look and structure.
- Keep Them Dry: After washing hands, dry your nails thoroughly. Trapped moisture can lead to lifting.
- Use Top Coat Regularly: Reapply top coat once a week to keep a shiny and smooth finish.
- Monitor For Lifting: If you see any lifting of the gel, get it fixed to avoid water and bacteria getting under the gel.
- Healthy Diet: Believe it or not, what you eat affects your nails. Consume foods rich in protein, vitamins, and minerals.
These straightforward steps can extend the life of your builder gel manicure, keeping your nails looking fresh and professional for weeks.

Common Mistakes to Avoid
When learning how to do builder gel nails, avoiding common mistakes is crucial. Here’s what you need to keep in mind to ensure superior results:
- Skipping Nail Preparation: Never skip cleaning, shaping, or buffing your nails. This step is essential for gel adhesion.
- Applying Thick Layers: Use thin layers of builder gel. Thick layers can prevent proper curing and may lead to bubbling.
- Touching the Cuticles: Ensure the gel does not touch your cuticles. This can cause lifting and reduce the lifespan of your manicure.
- Inadequate Curing Time: Always adhere to the recommended curing times. Undercuring can make the nails weak and prone to damage.
- Using Low-Quality Products: Opt for high-quality gels and lamps. Poor quality products can affect the durability and appearance of your nails.
- Neglecting the Thumb: The thumb often requires separate curing. Ensure it’s positioned under the lamp correctly.
- Forgetting the Top Coat: Always apply a top coat. It seals the gel and adds shine and protection.
Avoiding these common mistakes will help you achieve a more professional and long-lasting builder gel nail manicure.
Removing Builder Gel Nails Safely
Removing builder gel nails correctly is essential for nail health. Follow these steps to remove gel nails without damage:
- Gather Your Supplies: You will need acetone, foil, cotton balls, a nail file, and a cuticle stick.
- File the Surface: Use the nail file to gently buff away the shiny top coat. This helps the acetone penetrate the gel.
- Acetone Soaks: Soak cotton balls in acetone. Place them on your nails.
- Wrap with Foil: Wrap your nails with foil to hold the cotton balls in place. Wait for about 15 to 20 minutes.
- Check and Scrape: Gently scrape the gel off with a cuticle stick. If it’s tough, rewrap and wait longer.
- Clean and Hydrate: Once all gel is removed, wash your hands. Apply cuticle oil to nourish your nails.
- Rest Your Nails: Give your nails a break before your next manicure. This period helps them recover.
Following these steps will help ensure that your natural nails remain healthy and strong after removing builder gel nails.

