Step-by-Step Guide: Applying UV Gel Nails with Tips at Home
Contents
hide
Introduction to UV Gel Nails with Tips
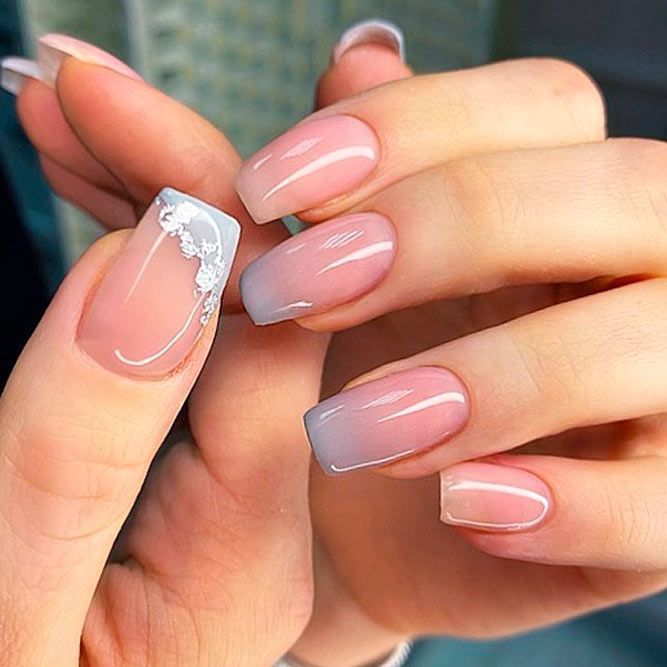
UV gel nails with tips offer a long-lasting and durable manicure option. This method involves attaching plastic tips to the natural nail to extend length, providing a consistent shape and solid foundation for the UV gel application. How to do uv gel nails with tips at home step by step?Home manicure enthusiasts find this process appealing due to the professional finish it provides right from the comfort of home.
Before starting, it’s important to have the right supplies. You will need UV gel tips, UV gel base and top coats, UV curing lamp, nail file, buffer, glue, and rubbing alcohol. Selecting the perfect nail tip size ensures a natural look and helps prevent issues like nail lifting. After attaching the tips with glue, you apply the UV gel base coat, cure it, and then move on to applying the gel color and design of your choice. Finally, sealing everything with a UV gel top coat solidifies your manicure, making it chip-resistant.
For beginners, the process might seem daunting initially, but with practice, achieving a salon-quality result is absolutely possible. Embrace your inner nail artist and watch as your nails transform with resilience and brilliance that only UV gel with tips can offer.
Let’s embark on this journey through a step-by-step guide that ensures your at-home manicure is a success and provides you with the tips and tricks for maintenance and safety. Are you ready to beautify your nails? Let’s get started!
Preparing Your Nails for the UV Gel Application
Great manicures start with well-prepared nails.How to do uv gel nails with tips at home step by step? Here’s how to prep your nails for a UV gel manicure at home:
Nail Filing and Buffing
First, shape your nails to your desired length and form. Use a nail file with gentle strokes, working in one direction. Once you have the shape, buff the surface of your nails. This helps the UV gel adhere better and last longer.
Pushing Back and Trimming Cuticles
Gently push your cuticles back using an orange wood stick or cuticle pusher. Be careful not to cut too deep when trimming any excess cuticle skin.
Cleaning with Rubbing Alcohol
Finally, cleanse each nail with rubbing alcohol and a lint-free pad to remove oils and debris. This ensures that the UV gel base coat will stick securely to your nail. Now you’re ready for the fun part – adding the UV gel tips and designing your perfect manicure!
Choosing the Right UV Gel Tips
How to do uv gel nails with tips at home step by step?Choosing the right UV gel tips is essential for a flawless manicure. Use these steps to select and apply them successfully at home.
Sizing Nail Tips
To find the perfect fit, align the nail tip with the edge of your natural nail. It should cover the nail from side to side without overlapping the skin. If a nail tip is too narrow, lifting can occur. Choose a size that sits comfortably on the natural nail.
Applying Nail Tips With Glue
Once sized correctly, apply a dot of glue to the tip or the natural nail. Place the tip at a slight angle to avoid air bubbles and press it down firmly. Hold for a few seconds to allow the glue to set. Cut and file to achieve the desired length and shape before moving on to the gel application.
Applying the UV Gel Base Coat
Before applying the UV gel polish, it’s important to lay down a solid base. The UV gel base coat is a crucial step in ensuring your manicure’s longevity and preventing chipping. Here’s how you can do it right at home:
Prepping Gel Application
Brush a thin, even layer of the UV gel base coat onto your nails. Careful application is key to avoid flooding the cuticles or edges. Ensure the gel does not make contact with your skin, as this can lead to lifting later on.
Curing the Base Coat
After applying the gel base coat, place your nails under a UV curing lamp. Follow the manufacturer’s instructions for the correct curing time, usually around 45 to 60 seconds. It’s normal for the base coat to remain tacky after curing; this helps the gel color layer adhere better. Remember, do not touch your nails between layers to avoid any smudges or dents.
With these steps, you are now ready to move on to selecting the UV gel polish colors and designing your desired look.
Applying and Designing with UV Gel Polish
Once you have your UV gel tips securely in place, it’s time to get creative with the UV gel polish. How to do uv gel nails with tips at home step by step?Here’s how you can apply and design your nails with a professional touch.
Selecting Colors and Design Tools
Begin by choosing your gel polish colors. Consider your outfit, occasion, or season to match or contrast your look. Next, gather your design tools such as brushes, dotting tools, or stickers for intricate details.
Step-by-Step Gel Polish Application
Start with a thin layer of your chosen gel polish color. Spread it evenly over the nail, avoiding the cuticles and skin. Cure under the UV lamp for the time specified by the polish brand, usually about 45 seconds. For deeper color or complex designs, add additional layers of polish, curing after each one.
Curing Each Layer
Curing is key to hardening the gel polish and ensuring your manicure’s durability. After you apply each polish coat or design element, cure it under the UV lamp. This sets the polish and prepares the surface for the next layer or the top coat final seal.
By following these steps, you create not just a manicure, but a personal statement that’s both resilient and stylish. In the next section, we’ll seal the deal with a UV gel top coat to lock in that beauty and shine.
Sealing with a UV Gel Top Coat
To finish your UV gel nails, apply a top coat carefully. Brush a thin layer, covering the color and tips. This step is vital for durability and shine. After applying, cure the nails under your UV lamp. Check the lamp’s timer – 45 to 60 seconds is typical. The top coat makes your manicure last longer without chips or scratches. It also gives it a glossy finish that looks professional.
Importance of Sealing Tips
Sealing the edges of your nails is crucial. It helps prevent the gel from lifting and chipping. Make sure to apply the top coat slightly over the tip. Don’t skip this detail; it’s key for extending your manicure’s life.
Curing the Top Coat
After applying the top coat, place your nails under the lamp. Cure them as per the time the manufacturer recommends. This hardens the coat and locks in color beneath. Once cured, your nails are set and strong, ready for any activity!
Maintenance and Safety Tips
Maintaining your UV gel nails is key for longevity. How to do uv gel nails with tips at home step by step?Regular nail care keeps your manicure fresh and your nails healthy. Here are important tips to maintain your UV gel nails and ensure safe practices when handling UV gels and lamps at home.
Regular Nail Care
To preserve your manicure, consider these simple, routine steps:
- Keep nails dry and clean. This prevents bacteria and promotes lasting gel adherence.
- Apply cuticle oil daily. This nourishes your nails and keeps the cuticles soft.
- Wear gloves for chores. Protect your gel nails when cleaning or washing dishes.
- Avoid harsh chemicals. Chemicals can weaken the gel, causing chips or peels.
- File any snags immediately. Quick fixes prevent further damage to the gel nails.
Safe Gel Nail Removal
When the time comes to remove your UV gel nails, safety is crucial. Here’s how to do it without harm:
- Use a gel polish remover. Avoid peeling or forcing the gel off your nails.
- Soak nails in acetone properly. Use foil wraps and cotton pads for effective removal.
- Gently remove the softened gel. Use a wooden stick or a pusher carefully.
- Moisturize after removal. Rehydrate your nails with oil or a hydrating cream.
- Give nails a break occasionally. This allows your natural nails to recover from gels.
Remember, using the right removal technique preserves the integrity of your natural nails. If you feel discomfort or notice any nail damage, seek professional advice.
Conclusion: Enjoying Your At-Home UV Gel Nails
Congratulations on completing your at-home UV gel nail application! With these steps, you’ve learned how to create a durable, professional-looking manicure right in the comfort of your own space. Remember to take care of your new nails. Use cuticle oil daily, and wear gloves for household tasks.
As you enjoy your beautiful nails, remember that practice makes perfect. Every time you apply gel nails with tips, you’ll get better. The process will become easier and faster.
When it’s time to remove your gel nails, do it safely. Use a gel polish remover and follow the correct soaking steps. After removal, always rehydrate your nails.
Lastly, give yourself a round of applause. You’ve mastered a new skill that adds beauty and joy to your life and perhaps even your friends and family if you choose to share it. So flaunt those gorgeous nails and look forward to your next gel manicure adventure at home!