Dazzle with Summer Ombre Nails: A Colorful Journey
Contents
hide
The Magic of Gradient Glamour
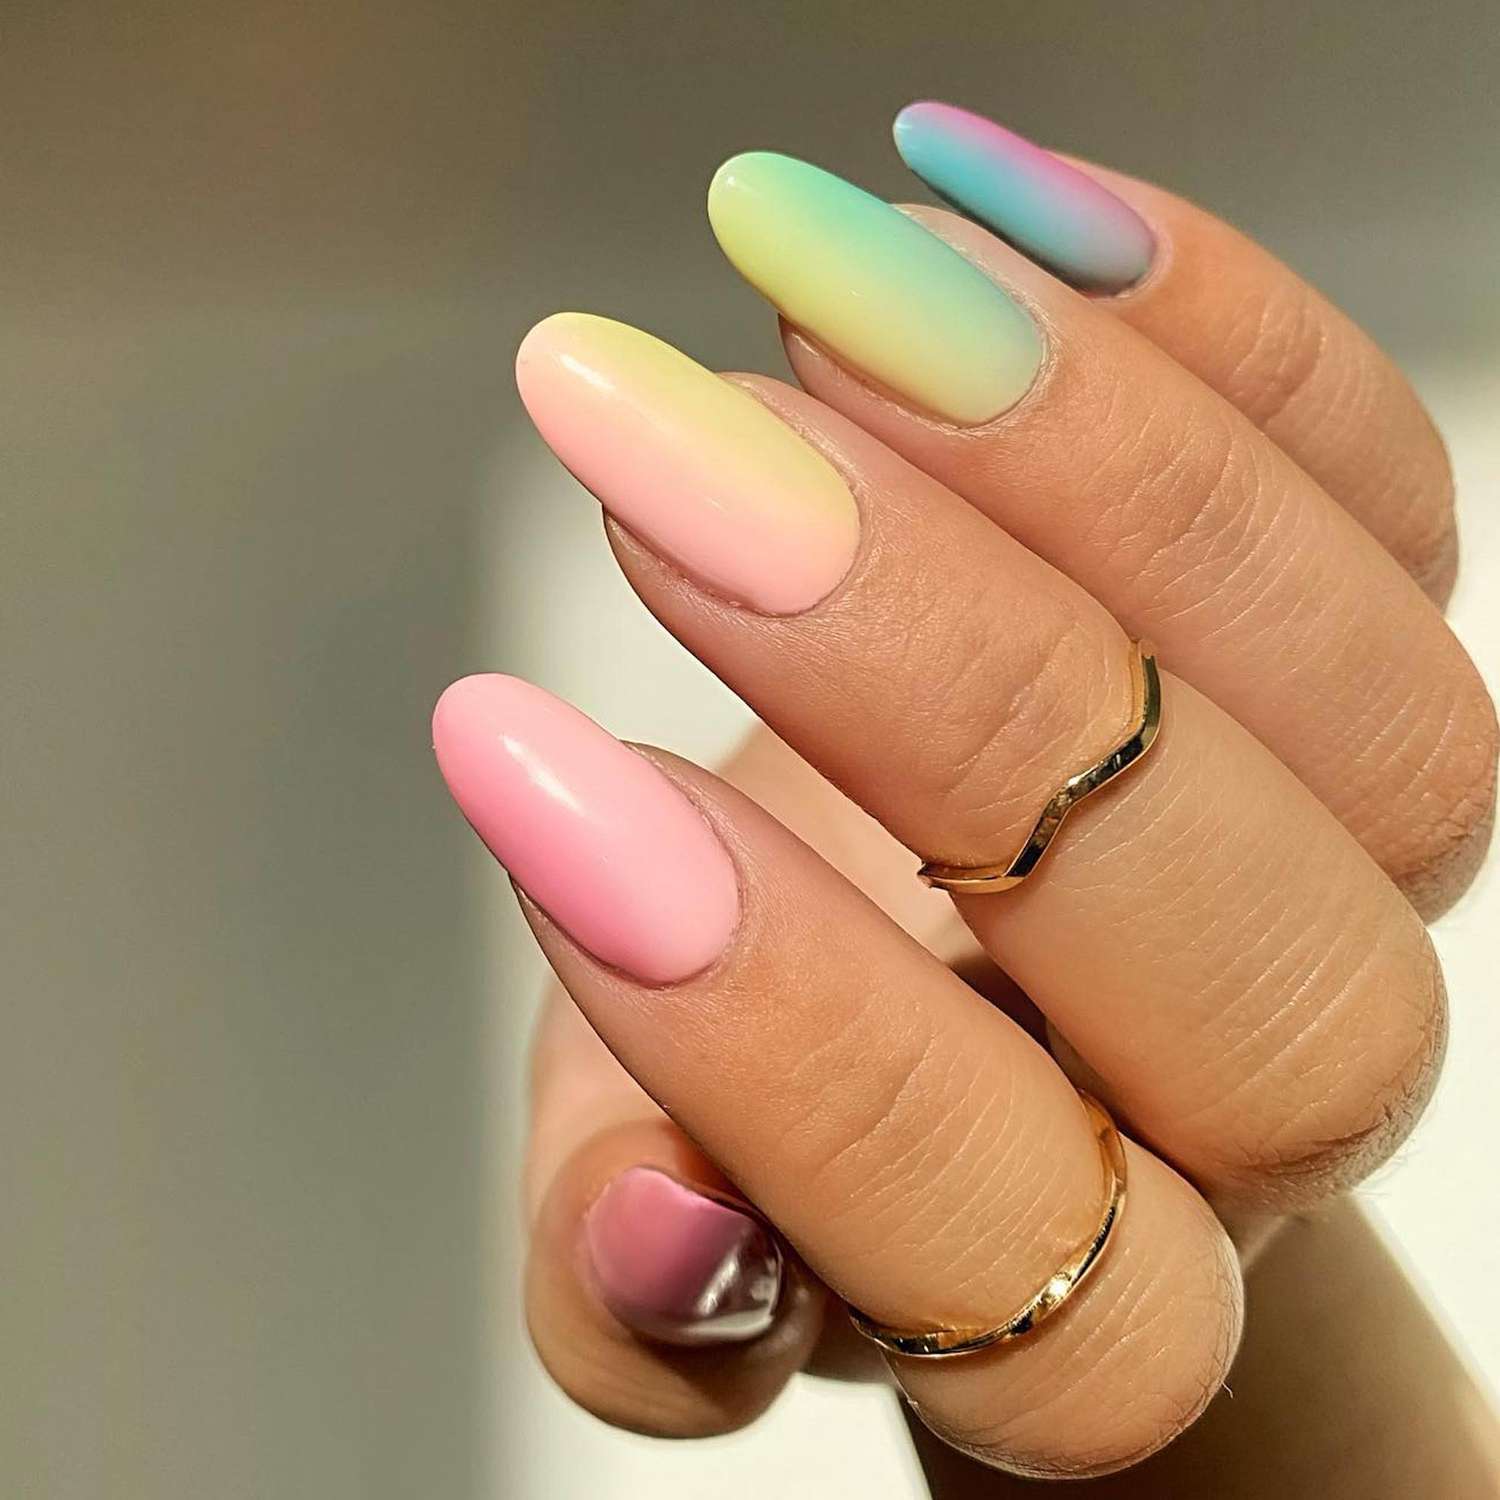
Summer brings a vibrant energy that calls for equally lively nail designs. Among the hottest trends, ombre nails stand out as a versatile and eye-catching choice. This gradient technique creates a seamless transition between colors, resulting in a mesmerizing effect perfect for sunny days and balmy nights. From subtle pastels to bold neons, ombre nails offer endless possibilities to express personal style and complement any summer outfit. Moreover, the blended colors evoke the essence of summer, mirroring the gradual shift of hues in a sunset or the varying shades of ocean waves. As the mercury rises, so does the popularity of this enchanting nail art technique, captivating nail enthusiasts and fashion-forward individuals alike.
Crafting the Perfect Color Palette
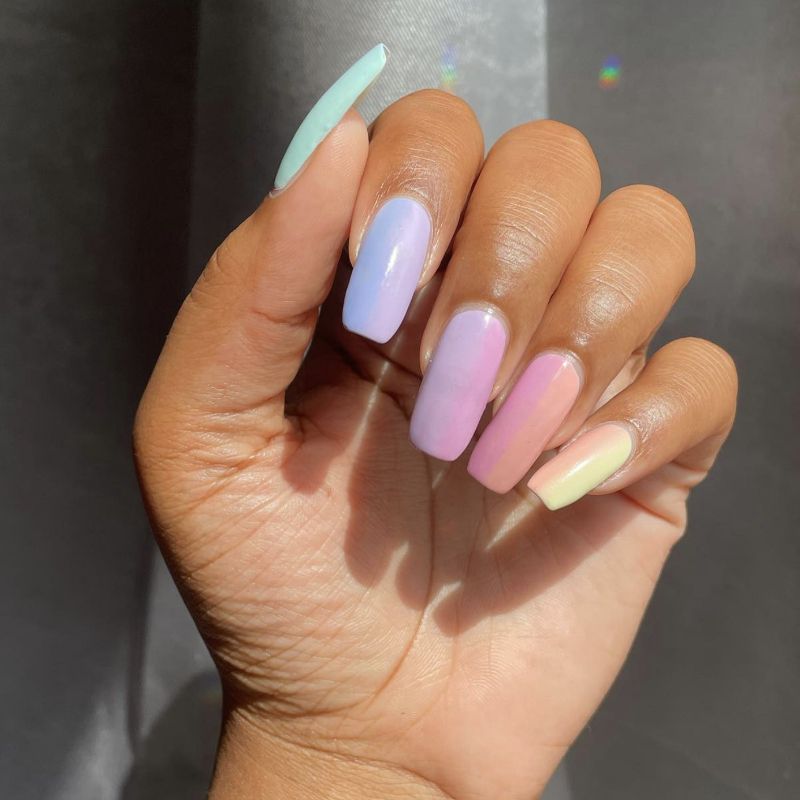
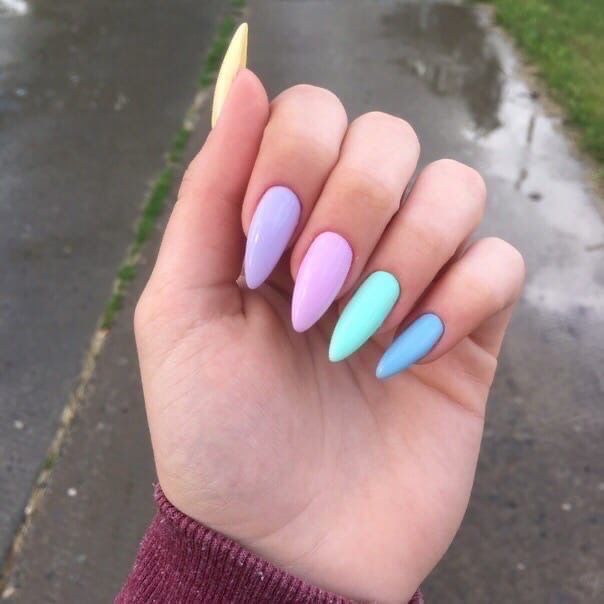
Choosing the right colors is crucial for creating stunning summer ombre nails. Vibrant hues like coral, turquoise, and sunshine yellow capture the essence of the season, while softer tones such as peach, lavender, and mint evoke a sense of relaxation. When selecting colors, consider factors like skin tone, current fashion trends, and personal preferences. Additionally, experimenting with unexpected color combinations can lead to unique and striking results. For instance, pairing a deep blue with a bright orange creates a sunset-inspired look that’s sure to turn heads. Furthermore, don’t shy away from incorporating metallic shades for an extra touch of glamour. The key to a successful ombre design lies in finding the perfect balance between complementary colors that flow seamlessly into one another, creating a visually appealing gradient that catches the eye and sparks conversation.
Mastering the Ombre Technique
Achieving the perfect ombre effect requires practice and patience. To begin, apply a base coat to protect the nails and ensure a smooth surface. Next, select two to three complementary colors and apply the lightest shade as the base. Using a makeup sponge, dab the darker colors onto the nail, gradually blending them to create a seamless transition. For best results, work quickly and use light, tapping motions to avoid harsh lines. Finally, seal the design with a top coat to enhance shine and longevity. With each attempt, the technique becomes easier, allowing for more intricate and precise gradients. Aspiring nail artists can also experiment with different application methods, such as using a thin brush for more control or trying the “saran wrap” technique for a unique, marbled effect. As skills improve, the possibilities for creating stunning ombre designs expand, leading to truly personalized and professional-looking manicures.
Essential Tools and Products for Flawless Execution
Having the right tools and products on hand is essential for creating professional-looking ombre nails. Invest in high-quality nail polishes with good pigmentation and a smooth consistency. A set of fine-tipped brushes and makeup sponges will help achieve precise application and blending. Additionally, a good base coat and top coat are crucial for protecting the nails and extending the life of the manicure. Other helpful items include nail tape for creating clean lines and a clean-up brush for perfecting the edges. By using these tools effectively, even beginners can create stunning ombre designs at home. Moreover, consider investing in a UV or LED lamp if opting for gel polish, as this can significantly increase the longevity of the ombre manicure. With the proper equipment, creating salon-quality ombre nails becomes an achievable and enjoyable task for nail enthusiasts of all skill levels.
Elevating Ombre with Glitter and Accents
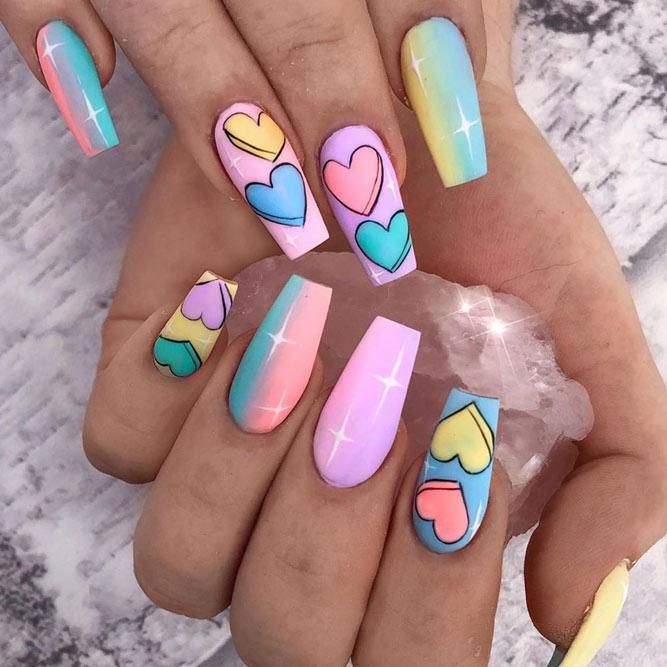
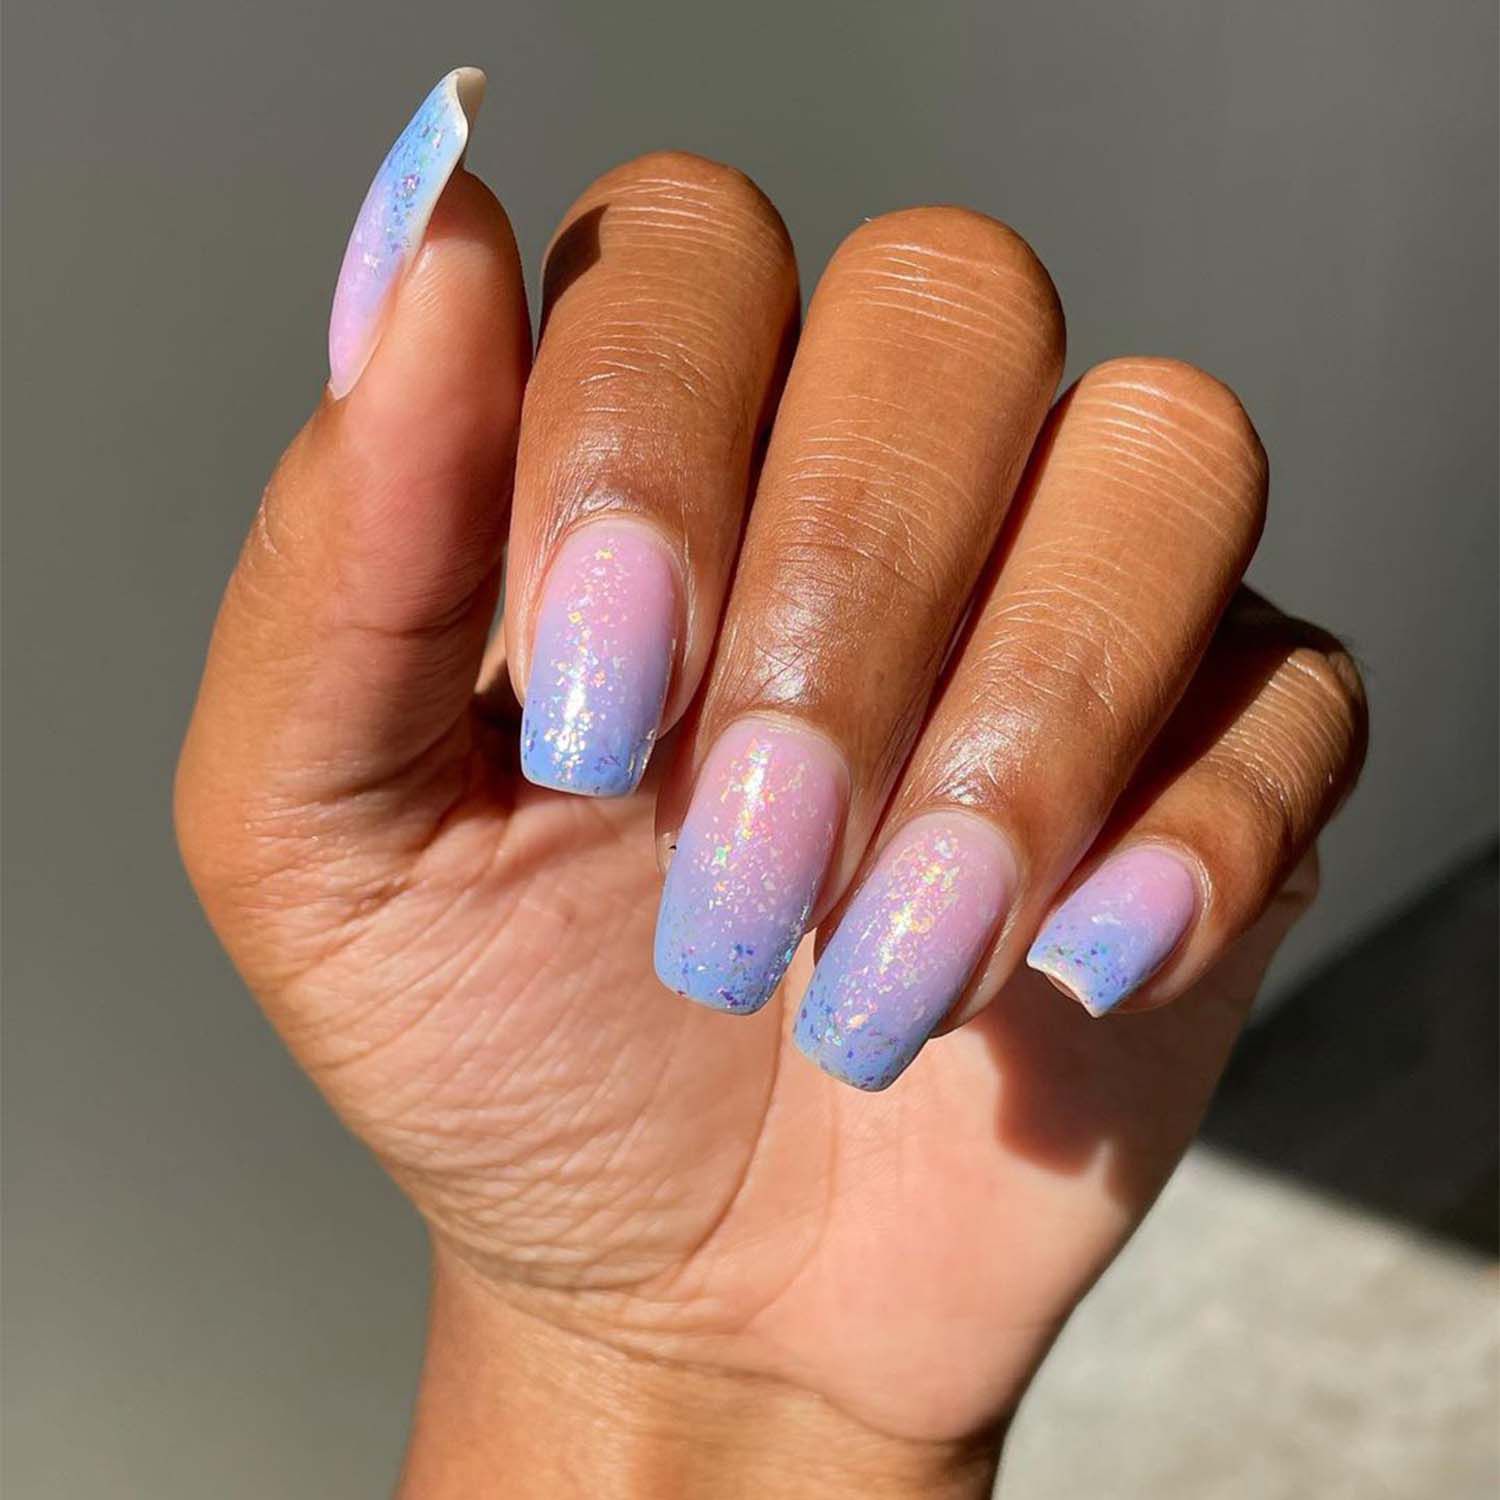
To take summer ombre nails to the next level, consider incorporating glitter or other accents. Adding a sprinkle of glitter to the lightest part of the ombre creates a dazzling effect reminiscent of sun-kissed sand. Alternatively, applying a glitter top coat over the entire nail adds a subtle sparkle that catches the light beautifully. For those feeling more adventurous, try adding small rhinestones, studs, or hand-painted designs to accent the ombre effect and create a truly unique look. These embellishments can transform a simple gradient into a work of art, perfect for special summer occasions. Experiment with different textures and finishes, such as matte topcoats on certain nails or holographic glitters for an extra dimension. The key is to balance these additional elements with the ombre design, ensuring they enhance rather than overpower the gradient effect. With creativity and a steady hand, these accents can elevate summer ombre nails from beautiful to breathtaking.
Maintaining Your Ombre Masterpiece
Proper maintenance is key to keeping summer ombre nails looking fresh and vibrant. Apply a top coat every few days to prevent chipping and maintain shine. When performing tasks that may damage the nails, such as washing dishes or gardening, wear gloves to protect the manicure. Moisturize the cuticles and surrounding skin regularly to keep them healthy and prevent peeling. If chips do occur, touch them up promptly with the appropriate colors to extend the life of the manicure. By following these simple steps, an ombre manicure can last well into the summer season, continuing to dazzle and delight. Additionally, consider using cuticle oil daily to nourish the nail bed and surrounding skin, promoting overall nail health. For those using gel polish, remember to properly remove the manicure when it’s time for a change, avoiding the temptation to peel or pick at the polish, which can damage the natural nail. With diligent care, summer ombre nails can remain a stunning accessory throughout the season.
Ombre for Every Summer Occasion
One of the great advantages of ombre nails is their versatility. For a day at the beach, opt for a bright, tropical-inspired ombre featuring shades of blue and green. When attending a summer wedding, choose a more subdued palette with soft pinks and champagne tones. For a night out, create a bold statement with neon colors or a dramatic dark-to-light gradient. The possibilities are endless, allowing for a fresh look for every occasion throughout the summer season. This adaptability makes ombre nails a go-to choice for fashionistas and nail enthusiasts alike. Consider creating themed ombre designs for specific events, such as patriotic colors for Independence Day celebrations or pastel gradients for garden parties. The beauty of ombre nails lies in their ability to be customized for any setting, ensuring that your manicure always complements your outfit and the occasion perfectly.
DIY vs. Professional Application: Weighing the Options
While creating ombre nails at home can be a fun and rewarding experience, there are times when seeking professional help may be beneficial. DIY ombre nails are great for those who enjoy nail art and have steady hands. However, achieving a flawless gradient can be challenging, especially for beginners. Professional nail technicians have the experience and tools to create perfectly blended ombre nails quickly and efficiently. They can also offer advice on color combinations and incorporate more complex designs or accents. Ultimately, the choice between DIY and professional application depends on personal skill level, time availability, and desired outcome. For special occasions or when aiming for a particularly intricate design, visiting a salon might be the best option. On the other hand, practicing at home allows for creativity and skill development, potentially leading to salon-quality results with time and patience. Consider alternating between DIY and professional applications to enjoy the best of both worlds and continually improve your ombre nail art skills.
Drawing Inspiration from Nature and Fashion
Summer ombre nails often draw inspiration from the natural world and current fashion trends. Look to vibrant sunsets, tropical flowers, and exotic fruits for color ideas. Fashion runways and celebrity style can also provide inspiration for unique color combinations and nail shapes. Don’t be afraid to think outside the box and create ombre designs that reflect personal interests or upcoming events. For instance, patriotic red, white, and blue ombre nails could be perfect for summer holidays. By staying observant and open to inspiration, nail enthusiasts can continually refresh their ombre designs throughout the season. Consider creating a mood board or Pinterest collection to gather ideas and color schemes that resonate with your style. Magazines, art exhibits, and even summer landscapes can serve as unexpected sources of inspiration for your next ombre masterpiece. Remember that the most stunning nail designs often come from personal interpretation and creativity, so use these inspirations as a starting point to develop your unique summer ombre style.
The Impact of Nail Shape on Ombre Designs
The shape of the nails can significantly impact the overall look of summer ombre designs. Long, almond-shaped nails provide a larger canvas for gradients, allowing for more intricate color transitions. Shorter, square nails can create a bold, modern look with ombre designs. Stiletto nails offer a dramatic backdrop for daring color combinations. When choosing a nail shape, consider factors such as lifestyle, personal style, and the specific ombre design in mind. Experimenting with different shapes can lead to exciting new looks that perfectly complement the chosen ombre palette.
Oval nails, for instance, offer a classic and versatile shape that works well with most ombre designs, while coffin nails provide an edgy, contemporary look that can make bold color gradients truly pop. Don’t be afraid to try different nail shapes to find the perfect match for your summer ombre creations. Remember that nail shape can also affect the application technique, so be prepared to adjust your approach accordingly. With the right combination of nail shape and ombre design, you can create a stunning and personalized summer look that reflects your unique style and personality.