
Gel Nail Removal: Safe and Simple Techniques
Introduction to Gel Nail Polish
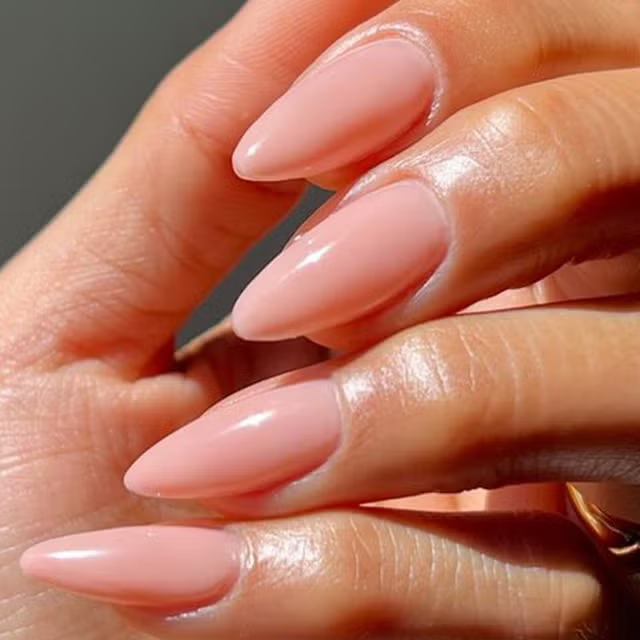
Gel nail polish has revolutionized the beauty industry with its durability and glossy finish. Unlike traditional lacquers, gel polish requires curing under a UV or LED lamp to set. This process creates a long-lasting manicure, typically chip-free for weeks. Clients love the ease of having beautiful nails that withstand daily tasks without frequent touch-ups.
Many mistake gel for shellac, but they differ. Shellac is a brand name by CND. It’s similar to comparing ‘Jacuzzi’ to ‘hot tub.’ Both signify quality in their respective categories but are not the same.
The benefits of a gel polish manicure are numerous. They maintain a shine that doesn’t dull and resist scratching better than regular polish. Gel manicures can help protect and grow natural nails when followed by proper aftercare. They are also a boon for nail biters trying to kick the habit.
However, as exquisite as gel nails may be, the removal process is critical. Incorrect gel removal can damage the nail bed, making nails thin and brittle. It can also affect how the next manicure looks. Proper removal is key to preserving nail health and ensuring that gel nails remain a positive experience.
In this guide, we will cover the correct ways on how do you remove gel nails, whether at home or in a salon, and provide tips for aftercare to keep your natural nails healthy and strong.
The Hazards of Improper Gel Nail Removal
Peeling or picking off gel nails may offer instant gratification but at a high cost to nail health. This method doesn’t just remove the polish – it peels away layers of the nail plate too. Over time, this leads to nails that are thinner, weaker, and more brittle. Imagine the protective layers of your nails being torn away, leaving them vulnerable and damaged.
Repeated improper gel removal can result in a cycle of weak nails. Nails may become prone to breakage and may struggle to recover their former strength. This condition can last for months, challenging the health and growth of your natural nails. Not to mention, it can significantly impact the appearance and adherence of future gel manicures.
In addition to structural damage, chemical exposure during incorrect removal can be harsh on nails and surrounding skin. Using tools or chemicals improperly can cause irritation or even injury to the nail beds and cuticles. After all, soaking your nails in acetone is not without its risks – it’s a powerful solvent that requires careful handling.
Yet, it’s not just the nails themselves that suffer. Incorrect removal techniques can also compromise the quality of subsequent manicures. Nail techs will find it challenging to apply gel polish evenly on damaged nails, resulting in less than perfect gel applications.
Improper gel nail removal poses significant hazards to nail health. Techniques that damage the nail bed and plate may lead to longer-term issues. Peeling off gel polish should be avoided at all costs. Instead, it is crucial to follow the safe and simple techniques that will be covered in this guide to ensure the integrity and beauty of your nails.
Preparing for the Gel Removal Process
Preparing for gel nail removal is just as important as the removal itself. Here’s what you’ll need before you start:
- Non-acetone nail polish remover or 100% acetone: Acetone is more effective but can be harsher on your skin.
- Cotton balls or pads: These will be used to apply the acetone to your nails.
- Aluminum foil: Small pieces of foil will help keep the cotton balls in place.
- Nail file: You’ll need this to gently buff the shiny top coat of your gel nails.
- Cuticle oil: This will protect your skin from the drying effects of acetone.
- Orange stick or cuticle pusher: A tool to help gently push the gel polish off after soaking.
Before starting the removal process, make sure you’re in a well-ventilated area to avoid inhaling fumes from the acetone. Cover your work surface with a protective layer, like an old towel, to prevent damage from spills.
At the outset, use the nail file to gently buff the surface of your gel nails. This breaks the top seal and allows the acetone to penetrate more effectively. After buffing, apply cuticle oil around your nail beds to safeguard your skin from the drying effects of acetone.
With your materials ready and a little preparation, you’re set to start the gel nail removal process safely and effectively. Next, we’ll go through the step-by-step process to ensure you remove your gel nails without harming your natural nails.
Step-by-Step Gel Removal Guide
Removing gel nails can be done safely with the right tools and patience. How do you remove gel nails?Let’s go through the step-by-step guide to carefully and effectively remove your gel polish.
Gather Your Materials
Before you begin, have these items ready:
- 100% acetone (it breaks down gel polish more effectively than non-acetone removers).
- Cotton balls or pads (for applying acetone to your nails).
- Aluminum foil (to secure cotton balls and aid in removal).
- Nail file (to buff off the shiny top coat).
- Cuticle oil (to protect your skin from acetone).
- Orange stick or cuticle pusher (to gently remove the polish).
Filing and Protecting
Start by lightly buffing the surface of your gel manicure with a nail file. Remove the shine to allow the acetone to soak through. Next, apply cuticle oil around your nails to shield your skin.
Soaking Your Nails
Soak a cotton ball in acetone, place it directly on the nail, and wrap it with foil. This helps the acetone to stay focused on the nail.
Waiting Time
Patience is key. Leave the acetone wraps on for about 10 minutes. Some nails may require a little more time.
Check and Gently Push
After waiting, check if the gel polish is lifting off. Use the orange stick or cuticle pusher to carefully ease the gel off the nail.
Rinse and Hydrate
After all gel is removed, rinse your hands with mild soap and apply cuticle oil to rehydrate.
This method helps you remove gel nails without damage. However, if you encounter issues, consider seeking a professional for assistance.
Professional vs. At-Home Gel Removal
Choosing the right method to remove gel nails is vital. Let’s look at the pros and cons.
Benefits of Professional Gel Removal
Relying on a professional has several advantages:
- Less Risk of Damage: Experts know how to avoid harming your nails.
- Proper Tools: Salons have the right equipment for safe removal.
- Skill and Patience: Professionals have the techniques and patience that ensure no nail is hurt.
- Aftercare Advice: Experts can give tips on nail health post-removal.
At-Home Gel Removal Steps
You can remove gel nails at home with care:
- Gather Supplies: Get acetone, cotton balls, foil, a nail file, cuticle oil, and an orange stick.
- Protection: Use cuticle oil to shield your skin from acetone.
- Buff: Lightly file off the shiny top coat.
- Wrap: Soak cotton in acetone, apply to nails, and wrap in foil.
- Wait: Leave it on for about 10 minutes to soften the gel.
- Push: Gently ease off the polish with the orange stick.
Home removal requires patience and care. It might not match a professional’s skill.
Deciding Between the Two
Think about these points when choosing:
- Nail Health: If nails are weak, see a professional.
- Experience: If unsure, professionals can prevent mistakes.
- Time and Cost: Weigh the time investment and cost of both options.
Both methods can work well. Pick the one that fits your needs and nail condition best.
Aftercare: Tips for Nail Health Post-Removal
After removing gel nails, it’s crucial to focus on aftercare. To help your nails rebound from the gel removal process, consider these practical tips:
- Moisturize Regularly: Apply cuticle oil or a hydrating cream to nails and cuticles. This helps ward off dryness due to acetone exposure.
- Nourish Your Nails: Look for nail treatments enriched with vitamins, such as biotin or keratin. These can bolster nail health.
- Avoid Harsh Chemicals: Keep nails away from detergents and cleaners. Use gloves when cleaning to shield your nails from damage.
- Take Breaks: Allow natural nails time to breathe between gel applications. This aids in their recovery.
- Trim and File: Keep your nails trimmed and filed. Smooth edges reduce snags and breakage.
- Gentle Buffing: Lightly buff your nails to even out any roughness. Avoid vigorous or frequent buffing which can thin the nail.
- Balanced Diet: Eat foods high in protein, calcium, and vitamins. A healthy diet supports nail strength and growth.
By following these aftercare tips, you help ensure the longevity and health of your nails post-gel manicure. Remember, when in doubt, consult a professional for personalized advice tailored to your particular nail needs.
Understanding the Costs: Salon vs. DIY Removal
When debating between salon or DIY gel nail removal, cost plays a big role. Salon visits for gel removal can add up quickly, especially if you get manicures often. You’ll pay for the service, expertise, and use of professional tools. Some salons charge separately for removal, while others include it in the price of a new manicure.
At home, the initial cost is in buying the supplies. You’ll need acetone, cotton balls, foil, a nail file, and cuticle oil. However, these supplies can be used multiple times, making DIY more budget-friendly over time. There’s no service fee, but you’ll invest your time.
Salon removal ensures less risk of nail damage if done by an expert. Yet, frequent salon trips can be costly. Doing it yourself might take longer and lack the professional touch, but it saves money.
Consider how often you wear gel nails to decide. Infrequent gel wearers may find salon removal cost-effective. Regular gel users might save with DIY removal despite the time investment. Always weigh both the financial and time costs when choosing your removal method.
Conclusion: Preserving Nail Health and Quality
Wrapping up, proper gel nail removal is vital for nail health. Choose between professional and at-home techniques based on your needs. Remember, patience and following the right steps ensure safety and prevent damage. Aftercare is crucial; moisturize and protect your nails to promote recovery. Weigh the costs of salon versus DIY removal, factoring in both time and money. Ultimately, the goal is healthy, beautiful nails after every gel manicure. Keep these tips in mind to make informed decisions and keep your nails in top condition.

